Hello,
I thought I’d document few steps I had to take in order to enable the BMC functionality of Foreman. For those who haven’t heard about this, the BMC allows you to power on/power off baremetal machines. It also allows to specify a different boot device and can give you some other interesting information. IPMI is typically a different network interface with it’s own IP, connected with it’s own ethernet cable and is “always” listening for commands even if the berametal server is turned off.
The communication overview

The Foreman uses Smart Proxy BMC module’s REST API to ask generic command, e.g. to turn on the server on IP 10.0.0.1. It also passes required credentials (typically username and password). The BMC module then uses a configured driver that performs the native IPMI communication with the target, in this example it uses ipmitool. There’s quite some configuration that needs to happen first and there’s one common issue developers face - they don’t have the hardware with IPMI device to test this on.
For this tutorial, I’ll assume your Foreman, Smart Proxy is running on the same host.
Getting the IPMI
While I can’t give you the hardware, there’s an ipmi-simulator that works quite well. It does not provide the networking information, but is good enough for playing with the functionality. The easiest way to get that running is to install it as a container. On fedora you could do something like
sudo dnf install podman
sudo podman pull vaporio/ipmi-simulator
sudo podman run --name ipmi_simulator --publish 623:623/udp docker.io/vaporio/ipmi-simulator:latest
(you may not need root, depends on your system configuration)
If all is good, you should see IPMI Simulator version 1.0.13 on STDOUT. So this added the virtual IPMI device to your host, don’t worry it won’t really turn off your computer, it’s just a simulator.
Configuring Smart Proxy
BMC is a Smart Proxy feature, that’s off by default. Open the ~foreman-proxy/config/settings.d/bmc.yml and copy the content of the bmc.yml.example from the repo. Make sure to set :enabled: true and set the :bmc_default_provider: ipmitool. Restart the smart proxy and refresh its feature in Foreman, you should now see BMC as a feature.
The BMC module uses a rubyipmi gem, that is an abstraction over multiple tools that can talk to IPMI devices. We instructed to use ipmitool, so we’ll need to install that first.
sudo dnf install ipmitool
Now let’s check whether it can talk to our simulator
ipmitool -H 127.0.0.1 -U ADMIN -I lanplus -P ADMIN chassis status
Note the IP, username and password. The -I stands for the version of IPMI protocol to use. If it works you see a similar output
Unable to Get Channel Cipher Suites
System Power         : on
Power Overload       : false
Power Interlock      : inactive
Main Power Fault     : false
Power Control Fault  : false
Power Restore Policy : always-off
Last Power Event     :
Chassis Intrusion    : inactive
Front-Panel Lockout  : inactive
Drive Fault          : false
Cooling/Fan Fault    : false
Setting up the Foreman
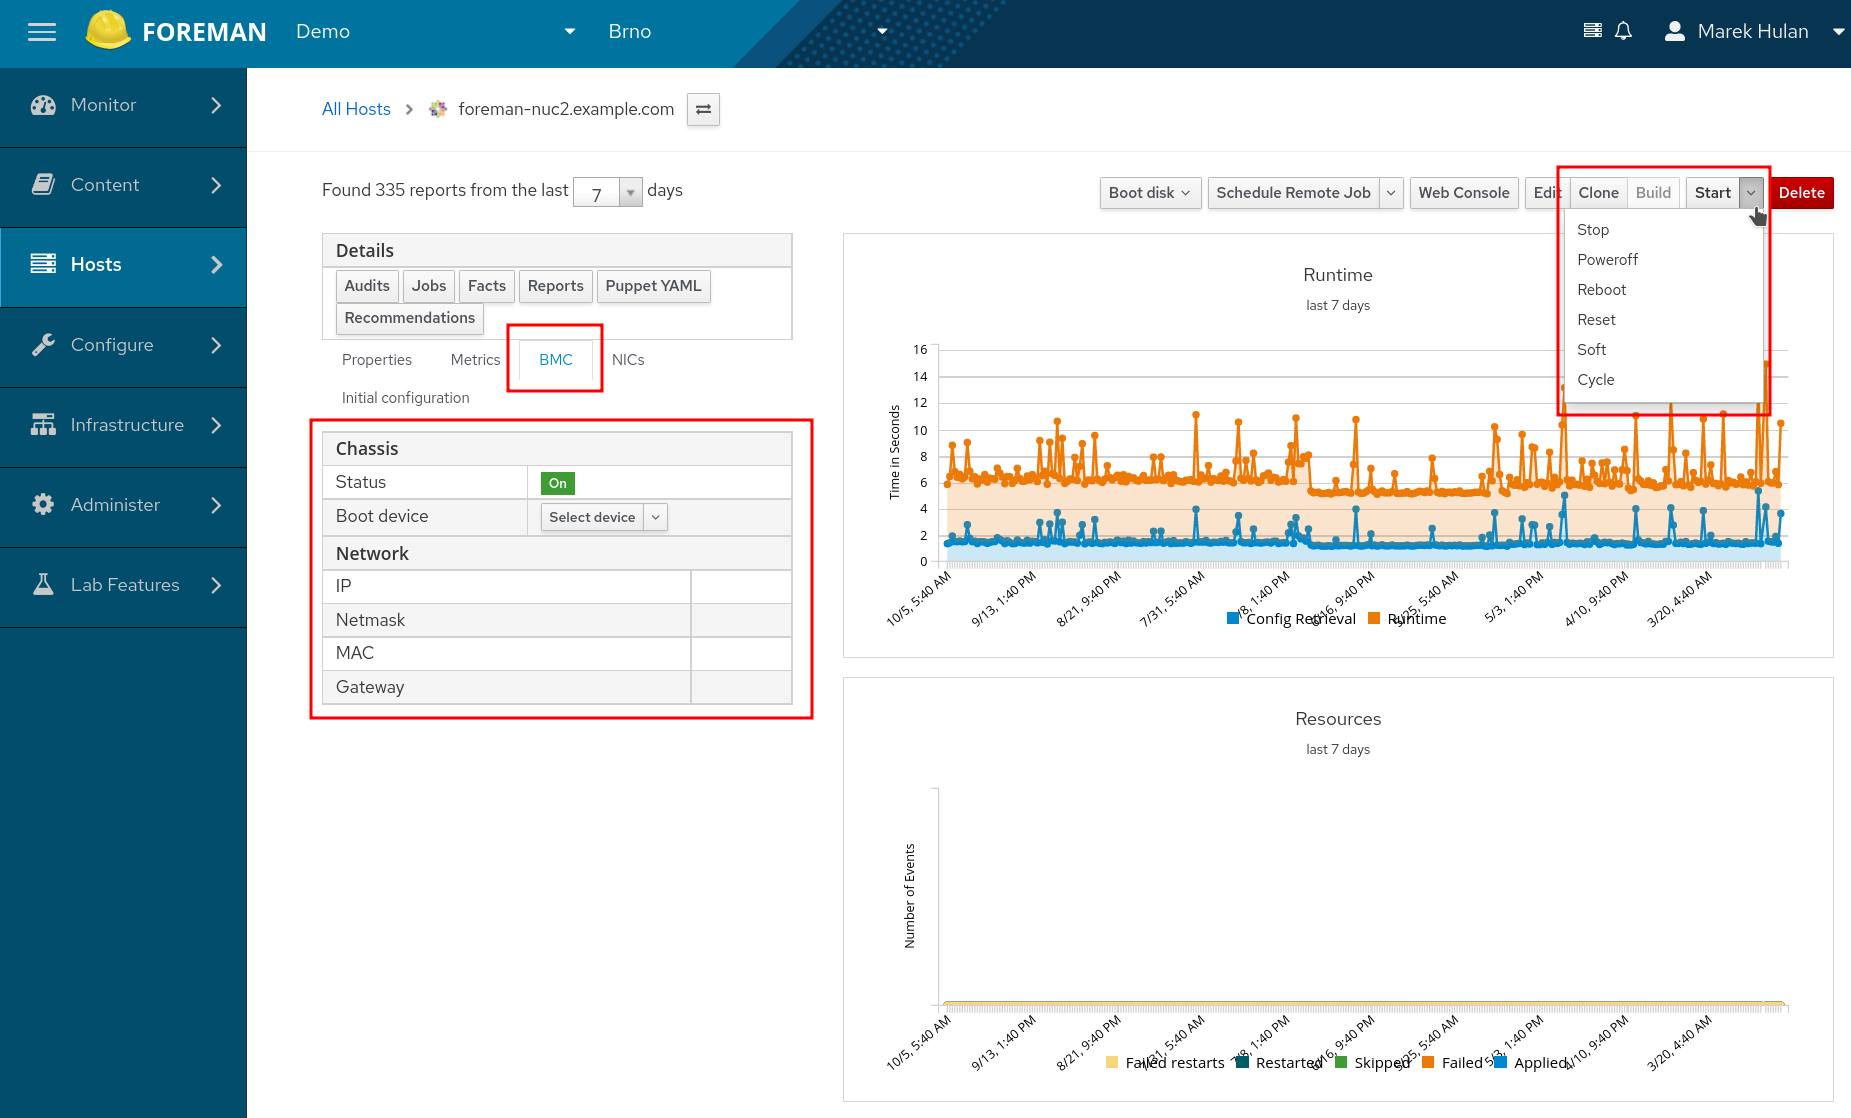
Alright so we have everything ready, the proxy can use ipmitool, which can talk to our simulated IPMI device and the proxy exposes the BMC API to the Foreman. Now there’s several steps you need to setup in your Foreman to see the functionality in the UI.
First, it’s important to understand how Foreman determines the proxy it uses for the BMC REST API calls. It looks at the host and tries to find a network interface of a BMC type. If there’s one, it looks at its subnet and checks if there’s a BMC proxy set for it. If it is, then it uses it.
So first, we need to associate the Smart Proxy with the BMC feature to the subnet. In subnet edit form, go to Proxies tab and pick the BMC Proxy in the drop down, save it.
Then pick a host on which you want to see the BMC functionality on. It can be both managed or unmanaged host and it does not matter where it actually runs or what IP it has. Navigate to its edit form, switch to the Interfaces tab. Click Add interface button and choose BMC as the type. Now select the Subnet you’ve prepared in the previous step. Uncheck the “Managed” checkbox, we don’t want the Smart Proxy to store this IP to DHCP etc. Manually enter the IP 127.0.0.1 and specify ADMIN as both username and password (capital letters matter). Keep IPMI as the provider.
Now save the host and if all goes well, you see few new things